Table of Contents
Why Turn your RSS Feed into Emails
If writing fresh content for your blog keeps you from having the time to write email newsletters for your list, you’re not alone. This is a problem a lot of business owners have. Luckily, MailChimp’s cool RSS-to-email tool can help. Recently, we set this up for my blog and love the results! This nifty tool takes your blog posts and automatically sends them to your subscribers as an email newsletter. Now I know what you’re thinking, “Isn’t that exactly what Feedburner and Feedblitz do?”
The answer is “not exactly,” because with MailChimp you get amazing customization options, tracking tools, spam filter checks, and can design your own template, and more.
In today’s post, I’ll explain the benefits of using the Mail Chimps RSS-to-Email system for bloggers.
Who Should Turn their RSS Feed into Emails?
You probably have an inventory feed if you have an eCommerce shopping cart that can send email inventory updates to your subscribers. You have an RSS feed through your social networking accounts that can send your recent updates to subscribers via email. Calendar and event services usually have RSS feeds that can keep your subscribers updated on your special events too.
How to Turn your RSS Feed Into Emails

This is just the beginning. You can turn all of your feeds into a trackable, automated email campaign with MailChimp. Here’s how to get started.
- Create or log in to your MailChimp account, and then from the “Create Campaign” dropdown, click “RSS-driven campaign.”
- Type in the URL for your RSS feed. If you can’t find your RSS feed URL, click your website’s RSS icon to open your feed page. If you still can’t find it, have MailChimp automatically finds the URL for you by entering your website’s blog URL. WordPress blogs are usually at www.yourdomain.com/feed.
- Decide whether you want to send RSS emails automatically to your entire list, or if you’d like to send to segmented lists. With segmented lists, your subscribers choose the categories of your blog posts they want to receive.
- Give your RSS-to-email list an awesome name so people receiving it know exactly what it is
- Choose to use MailChimp’s default “Message Subject” and “From Name,” or enter your own into the form provided. These are extremely important because they’ll appear on every RSS email that goes out to your list.
- Set the delivery schedule. The default setting is to send your emails of new blog posts to your every day you post new blog posts at 3 AM, EST. You can also set delivery for weekly emails of all your posts for the week, which are delivered every Monday at 3 AM, EST. Sending monthly emails is the last option, delivered on the first of every month at 3 AM, EST. Regardless of the delivery schedule, you select, MailChimp will only send an email if you post something new to your blog. Our blog sends out updates on Saturday at 11:00 AM EST.
- Choose your “RSS Publication Dates” setting. When you update an old blog post, this setting lets you email the post as an updated blog post, or you can modify the published date to make it appear like it’s a brand new blog post.
- Set up Advanced RSS Merge Tag Customizations if you don’t want to use the default tags. This gives you the power to add your own styles and formatting to your emails. You’ll see descriptions and quick examples for each customization option in this field. For example, with the *|RSS:RECENT10|* merge tag, you can display your last 10 recent blog posts in your emails. The *|MC:SHARE|* tag adds sharing icons for Twitter, Google+, and other social networks to your emails so subscribers can easily share them with others with a click.
- Choose your template. If you already have a MailChimp template set up for your email marketing campaigns, you can use it for your RSS-to-email campaign. If not, or if you want to design a different template for your RSS emails, create a new template from scratch, upload your own design, or use one of MailChimp’s free pre-made layouts.
- Create a signup form to add to your website using MailChimp’s provided code, or use an RSS-to-email plugin like WordPress List Subscribe Form.
- When you’re happy with your signup form and settings, click “Start RSS Campaign” to start sending your RSS emails automatically.
Measuring RSS-to-Email

Click on the reports tab in your account to check out the reporting features MailChimp offers. To measure results right in your WordPress interface, install the Analytics 360 plugin. It puts your MailChimp and Google analytics right there in your dashboard.
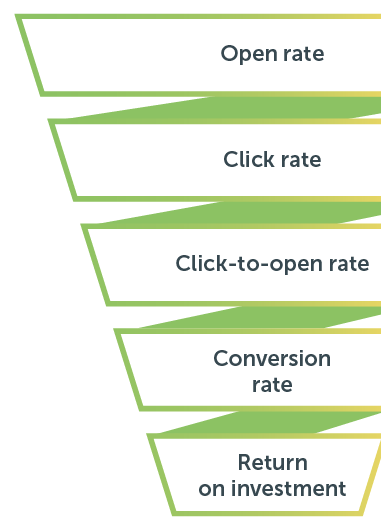
Some of the best stats to look for when evaluating the success of your RSS-to-email campaign are simple ones.
- Open rate
- Tweets and re-tweets
- Traffic to website
- Sales
Pause & Edit Your Campaign
Once you’re RSS email campaign is set, it runs on autopilot, but if you want to change your campaign, you can with the “Pause & Edit Campaign” button in your MailChimp account. After making your changes, click the “Start RSS Campaign” button and MailChimp will begin automatically delivering your emails again.
Let Your Content Work Double Duty

It’s not something you can set up in a few seconds, but taking the time to set up MailChimp’s RSS-to-email is worth the effort. Once it’s ready to go, all you have to do is blog. MailChimp takes care of the rest automatically. It’s a simple and inexpensive way to stay in contact with your audience.
Do you use MailChimp’s RSS-to-email, or another RSS-to-email service like Feedburner or Feedblitz? Tell me about it. Leave a comment below.
